Category: Uncategorized

  • More Than Just Storage: Transforming Commercial & Trade Fleet Vehicles with Custom Cabinetry Systems

    More Than Just Storage: Transforming Commercial & Trade Fleet Vehicles with Custom Cabinetry Systems

    For tradespeople and commercial fleets, a vehicle isn’t just a way to get from A to B; it’s a mobile workshop, a rolling office, and a crucial component of productivity. Disorganised tools, damaged equipment, and wasted time searching for materials are direct hits to your bottom line. At Revanped, we specialise in designing and installing custom cabinetry and storage systems that transform ordinary commercial and trade vehicles into highly efficient, secure, and professional mobile workspaces.

    The Hidden Cost of Disorganisation: Why Custom Solutions Pay Off

    While off-the-shelf shelving might seem like a quick fix, true efficiency comes from a tailored solution. The costs of a disorganised vehicle often go unnoticed:

    • Lost Productivity: Time spent searching for tools or materials is billable time lost.
    • Damaged Equipment: Loose tools and unsecured materials get damaged, leading to expensive replacements.
    • Safety Hazards: Unsecured loads can shift, creating dangerous situations during transit.
    • Unprofessional Image: A messy, disorganised vehicle doesn’t instill confidence in clients.
    • Reduced Carrying Capacity: Inefficient storage wastes valuable cargo space.

    Revanped’s Custom Cabinetry Solutions: Built for Your Business

    We understand that every trade and business has unique requirements. Our custom cabinetry systems are designed to address these specific needs, turning your vehicle into a strategic asset.

    • Maximised Space Utilisation: Our designers are experts at optimising every available inch. We create bespoke layouts that fit perfectly within your vehicle’s dimensions, from compact vans to large utility vehicles.
    • Tool-Specific Storage: No more rattling toolboxes. We design custom compartments, drawers, and shelving units for specific tools, equipment (e.g., power tools, plumbing fixtures, electrical components), and consumables, ensuring everything has its place.
    • Enhanced Security: Tools and equipment are valuable assets. Our custom cabinetry can incorporate secure locking mechanisms, ensuring your gear is protected when you’re on-site or parked overnight.
    • Durable, Trade-Tough Materials: We use robust, lightweight materials like marine-grade plywood, heavy-duty slides, and industrial-grade laminates that withstand the rigours of daily commercial use, resist wear and tear, and are easy to clean.
    • Ergonomic & Accessible Design: We focus on making your workflow smoother. Cabinets are designed at ergonomic heights, drawers glide easily, and frequently used items are placed within easy reach, reducing strain and improving efficiency.
    • Integrated Solutions: Beyond just storage, we can integrate other essential features:
      • Power Solutions: Inverters, auxiliary batteries, and charging points for power tools and devices.
      • Lighting: Internal LED lighting for clear visibility in any conditions.
      • Work Surfaces: Pull-out workbenches or fold-down desks.
      • Specialised Racks: Racks for pipes, conduit, ladders, or other long items.
    • Professional Image: A well-organised, custom-fitted vehicle projects professionalism and attention to detail, enhancing your business’s reputation with clients.

    Who Benefits from Revanped’s Commercial Vehicle Upgrades?

    • Electricians, Plumbers, Carpenters: Custom storage for tools, fittings, and testing equipment.
    • Mobile Service Technicians: Organised bays for parts, diagnostic equipment, and repair tools.
    • Delivery & Courier Services: Efficient parcel management systems.
    • Horticulturists & Landscapers: Secure storage for smaller equipment and consumables.
    • Fleet Managers: Consistent, durable, and safe fitouts across multiple vehicles, improving efficiency and reducing maintenance costs.

    The Revanped Process for Commercial Vehicles:

    1. Needs Assessment: We start by understanding your trade, your daily operations, and the specific tools and materials you carry.
    2. Custom Design & Layout: Our team develops a bespoke layout for your vehicle, focusing on optimising workflow and storage. We provide detailed plans for your approval.
    3. Precision Fabrication: Your cabinetry is meticulously crafted in our workshop using high-quality materials and robust construction techniques.
    4. Professional Installation: Our experienced technicians expertly install the system in your vehicle, ensuring perfect fitment, security, and integration with your vehicle’s existing structure.

    Don’t let an inefficient vehicle hold your business back. Invest in custom cabinetry from Revanped and transform your commercial or trade fleet into a highly productive, organised, and professional asset.

    Ready to upgrade your fleet’s efficiency? Contact Revanped today for a consultation and discover how custom cabinetry can revolutionise your mobile workspace.

  • Conquer Any Terrain: Essential 4×4 External Accessory Installation for Your Adventure Vehicle

    Conquer Any Terrain: Essential 4×4 External Accessory Installation for Your Adventure Vehicle

    The call of the wild, the rugged tracks, and the remote campsites of the Australian outback demand a vehicle that’s truly prepared. At Revanped, we understand that your 4×4 isn’t just a vehicle; it’s your key to unlocking incredible off-road adventures. Beyond the engine, equipping your 4×4 with the right external accessories is crucial for safety, capability, and maximising your overlanding experience. Our expert installation services ensure your vehicle is ready to conquer any terrain, safely and reliably.

    Why External 4×4 Accessories Are Non-Negotiable for Serious Off-Roading:

    Adventure in your 4×4 in style and comfort with aftermarket vehicle accessories. This isn’t just about aesthetics; it’s about practical functionality and preparedness.

    • Protection from the Elements & Terrain: Bull bars, rock sliders, and underbody protection guard critical components from impacts with wildlife, rocks, and other hazards.
    • Increased Capability: Winches and recovery points are vital for self-recovery or assisting others in challenging situations. Snorkels protect your engine during water crossings.
    • Enhanced Utility & Storage: Roof racks, awnings, and external storage solutions allow you to carry more gear safely and create comfortable outdoor living spaces.
    • Lighting for Safety & Visibility: Auxiliary lighting illuminates the darkest tracks, improving safety and navigation.

    Key 4×4 External Accessories We Expertly Install:

    At Revanped, we don’t just sell accessories; we professionally install them with precision and care, ensuring optimal performance and longevity.

    1. Bull Bars & Nudge Bars
    2. Side Steps & Rock Sliders
    3. Roof Racks & Platforms
    4. Awnings
      • Straight / Rectangular Awnings:
      • Pull-Out Awnings
      • Roll-Out Awnings
      • Cassette Awnings
      • Bag Awnings
      • Batwing / 180-Degree Awnings
      • 270-Degree Awnings
      • Freestanding / Drive-Away Awnings:
      • Poled Drive-Away Awnings
      • Inflatable Drive-Away Awnings
      • Rear Awnings / Tailgate Awnings
      • Shower Tents
    5. Winches & Recovery Points
    6. Auxiliary Lighting (Light Bars, Spotlights)

    The Revanped Advantage for Your 4×4:

    Choosing Revanped for your 4×4 accessory installation means:

    • Expert Knowledge: Our team comprises experienced off-roaders and certified technicians who understand the demands placed on vehicles in rugged environments.
    • Quality Workmanship: We pride ourselves on meticulous installation, using the correct tools, techniques, and high-quality hardware to ensure every accessory is fitted securely and performs optimally.
    • Safety First: All installations adhere to relevant safety standards and manufacturer guidelines, ensuring your vehicle remains roadworthy and safe for adventure.
    • Integrated Solutions: We can advise on accessory combinations that work synergistically to enhance your vehicle’s overall capability.

    Don’t let an unprepared vehicle limit your horizons. Equip your 4×4 for the challenges of the Australian landscape with professional external accessory installation from Revanped.

    Ready to elevate your off-road game? Contact Revanped today to discuss your 4×4 accessory needs and get a quote for expert installation.

  • Smart Solutions: Maximising Your Camper Van Budget with Prefabricated Cabinetry

    Smart Solutions: Maximising Your Camper Van Budget with Prefabricated Cabinetry

    Dreaming of van life but worried about the budget? At Revanped, we understand that not everyone needs a fully bespoke, high-end fitout. That’s why we’ve developed a brilliant solution for those who want quality, functionality, and a professional finish without breaking the bank: our range of prefabricated camper van cabinetry. It’s smart design meets sensible spending, allowing you to achieve a stunning and functional interior efficiently.

    The Beauty of Prefab: Quality, Efficiency & Affordability

    Prefabricated cabinetry might sound generic, but at Revanped, it’s anything but. We’ve applied our extensive experience in custom builds to create modular, high-quality units that are designed for real-world van life. Here’s why it’s a game-changer for budget-conscious builders:

    • Cost-Effectiveness: The most obvious advantage. By standardising designs and optimising our manufacturing process, we significantly reduce the labour and design costs associated with fully custom builds. This saving is passed directly onto you.
    • Faster Turnaround Times: No lengthy design and fabrication phases. Our prefabricated units are ready to install, drastically cutting down the time it takes to get your van adventure-ready.
    • Professional Finish, DIY Friendly: Designed with ease of installation in mind, our modules come with clear instructions, making them an excellent option for confident DIYers. However, for those who prefer a seamless experience, we can also handle the installation for you. The result? A clean, professional finish that looks like a custom job.
    • Optimised for Van Living: These aren’t just off-the-shelf kitchen cabinets. Our prefabricated units are specifically designed for the unique challenges of a mobile environment. They’re lightweight yet robust, engineered to withstand vibrations and movement, and smartly designed to maximise every inch of precious van space.
    • Durable, Practical Materials: We use high-quality, lightweight plywood with durable laminate finishes that are easy to clean and resist wear and tear. Our hardware is selected for its strength and reliability on the road.
    • Modular Flexibility: Our range includes various essential units: kitchen galleys, overhead cabinets, bed platforms with integrated storage, and wardrobe units. You can pick and choose the modules that best fit your van’s layout and your specific needs, creating a semi-custom feel.
    • Smart Storage Solutions: Even in prefabricated units, intelligent storage is key. Expect clever drawers, ample cupboard space, and integrated solutions for appliances.

    Who Benefits from Revanped’s Prefabricated Cabinetry?

    • The Budget-Conscious Builder: Get a premium look and feel without the premium price tag.
    • The DIY Enthusiast: Enjoy the satisfaction of building your own dream van with high-quality, easy-to-install components.
    • The Time-Poor Adventurer: Get on the road faster with pre-made solutions that cut down build time significantly.
    • The Smart Investor: Our prefabricated units can increase the resale value of your van, offering a professional finish that appeals to future buyers.

    From Concept to Camper: How It Works

    1. Browse Our Range: Explore our selection of prefabricated cabinetry modules, designed for popular van models or adaptable to various layouts.
    2. Select Your Modules: Choose the kitchen, storage, and sleeping units that best fit your vision and van dimensions.
    3. Order & Receive: Your high-quality units are fabricated and prepared for pick-up or delivery.
    4. Install (or Let Us Do It!): Follow our straightforward instructions for a satisfying DIY install, or book our team to handle the professional fitment.

    Van life doesn’t have to be a distant, expensive dream. With Revanped’s prefabricated cabinetry, you can build a stylish, functional, and reliable camper van that gets you on the road to adventure sooner, and smarter.

    Ready to explore the possibilities? Visit our website or contact us today to learn more about our prefabricated camper van cabinetry and start your build.

  • The Art of Bespoke: Why a Luxury Custom Camper Van Fitout is the Ultimate Adventure

    The Art of Bespoke: Why a Luxury Custom Camper Van Fitout is the Ultimate Adventure

    Imagine a camper van that isn’t just a mode of transport, but a meticulously crafted extension of your personal style, a sanctuary tailored precisely to your adventurous spirit. This isn’t just a dream – it’s the reality we create at Revanped with our luxury custom camper van fitouts. In a world of mass-produced solutions, choosing a bespoke build means investing in unparalleled quality, intelligent design, and a truly unique mobile experience.

    Beyond the Basics: What Defines a Luxury Custom Fitout?

    A luxury custom fitout goes far beyond simply installing a bed and a few cupboards. It’s about a holistic design process that considers every detail, from the structural integrity of the build to the tactile feel of the materials. Here’s what sets a Revanped luxury custom build apart:

    • Tailored Design Philosophy: Your van becomes a blank canvas for your vision. We work collaboratively with you, understanding your travel habits, aesthetic preferences, specific gear requirements (think surfboards, garage storage for motorbikes, or a luxury aircon system). Every curve, every cabinet, every surface is considered to maximise both beauty and utility.
    • Premium Materials & Finishes: Forget flimsy composites. Our luxury builds incorporate high-grade, durable materials that are as beautiful as they are resilient. This includes marine-grade ply, solid timber accents, premium laminates, durable fabrics, and high-quality hardware that withstands the rigours of the road while exuding sophistication.
    • Integrated Smart Systems: Modern luxury isn’t just about looks; it’s about seamless functionality. We integrate advanced electrical systems (often 24V for optimal efficiency), comprehensive plumbing with ample hot water, climate control, and smart home features that allow you to monitor and control your van’s vitals from your phone. Think dimmable LED lighting, robust charging solutions for all your devices, and powerful inverters for true off-grid living.
    • Ergonomic & Space-Saving Innovation: Our designers are masters of spatial efficiency. Every inch is thoughtfully utilised, from hidden storage compartments and multi-functional furniture (a bench that transforms into a dining table, a bed that retracts to create a lounge area) to clever pop-up features and integrated appliance solutions. The goal is an open, airy feel that never compromises on utility.
    • Superior Craftsmanship: This is where the Revanped difference truly shines. Our team of skilled artisans takes pride in their meticulous attention to detail. Flawless joinery, perfectly aligned panels, robust fixings, and impeccable finishes are standard. This level of craftsmanship not only looks stunning but also ensures longevity and reliability for years of adventure.
    • Optimised for Your Vehicle: Whether you bring us a brand new Mercedes Sprinter, a robust Ford Transit, or a classic VW Crafter, our designs are meticulously adapted to the specific dimensions and characteristics of your chosen base vehicle, ensuring optimal fit and performance.

    The Revanped Custom Van Fitouts

    Our process is designed to be as enjoyable and transparent as the final product:

    1. Consultation & Visioning: We start by listening. What’s your dream? What adventures are you planning? We delve deep into your needs, desires, and budget.
    2. Conceptual Design & Layout: Our designers translate your vision into detailed 2D and 3D renderings, allowing you to visualise your future van and make informed decisions.
    3. Material Selection: You’ll choose from a curated selection of premium materials and finishes, ensuring every element aligns with your aesthetic preferences.
    4. Precision Fabrication & Installation: Our skilled craftspeople bring the design to life in our workshop, with rigorous quality checks at every stage.
    5. Testing & Handover: Before you drive away, your van undergoes thorough testing, and we provide a comprehensive handover, ensuring you’re confident and comfortable with every aspect of your new mobile home.

    A luxury custom camper van fitout from Revanped isn’t just an expense; it’s an investment in a lifestyle of unparalleled freedom, comfort, and adventure. It’s about building a home on wheels that truly reflects who you are and where you want to go.

    Ready to start crafting your ultimate adventure vehicle? Contact Revanped today for a consultation and let’s bring your dream van to life


    Full Name
    What can we help you with?
    Make, Model, Year, Body
  • A Comprehensive Guide to Camper Van Plumbing Systems

    A Comprehensive Guide to Camper Van Plumbing Systems

    One of the greatest luxuries of camper van life is the ability to have running water for cooking, cleaning, and personal hygiene, even when far from civilisation. A well-designed plumbing system is fundamental to this comfort, allowing you to carry fresh water, dispose of wastewater responsibly, and even enjoy a hot shower.1 This guide will break down the essential components of a camper van plumbing system, from the tanks that hold your water to the methods of heating it.

    Core Components of a Camper Van Plumbing System

    Every mobile plumbing setup relies on a few key elements working in unison:

    1. Water Tanks (The Heart of Your System)

    • Fresh Water Tank: This is where your clean, potable water is stored for drinking, cooking, and washing.2
      • Material: Always use food-grade plastic tanks to ensure water safety and prevent contamination.
      • Location: Can be installed inside the van (under beds, seats, or cabinetry) or underneath the chassis. Internal placement protects against freezing in colder climates, while external placement saves precious interior space.
      • Sizes: Camper van fresh water tanks vary widely, typically ranging from 20 litres to 100+ litres. The ideal size depends on your water consumption habits, how many people are travelling, and how often you plan to refill. For example, a solo traveller might be comfortable with 40-60L, while a couple with a shower might aim for 80-120L. Consider performing a “water audit” of your typical daily usage to determine your needs.
    • Grey Water Tank: This tank collects wastewater from your sinks and showers.3
      • Material: Durable, non-toxic plastic is standard. Often coloured grey for easy identification.
      • Location: Frequently mounted underneath the van to maximise interior space, but ensure it’s easily accessible for draining.
      • Sizes: Typically sized to be equal to or slightly larger than your fresh water tank. This ensures you have capacity for all the water you use, preventing overflows.
      • Regulations (Australia): While there’s no federal legislation in Australia mandating a grey water tank, many local councils, caravan parks, and national parks do have rules requiring self-contained vehicles to carry and properly dispose of grey water. It’s crucial to research the specific regulations for the areas you plan to visit. Always dispose of grey water at designated dump points.
    • Black Water Tank (Optional): This is only needed if you have a flush toilet that collects human waste. Many camper van conversions opt for composting toilets or portable chemical toilets, which do not require a black water tank connected to the plumbing system.4

    2. Water Pump (The Pressure Provider)

    • What: A 12V electric water pump is essential to draw water from your fresh tank and deliver it with pressure to your taps and shower.5
    • Why: Creates the necessary water flow for comfortable use, simulating a home plumbing experience.
    • Types:
      • Diaphragm Pumps: The most common type for RVs, known for their reliability and relatively quiet operation.6 They typically activate when pressure drops (e.g., when you open a tap) and turn off when pressure is restored.
      • Flow Rate: Measured in litres per minute (L/min). A common flow rate for a camper van is around 7-12 L/min, which is sufficient for a sink and shower. Higher flow rates might be desired for multiple fixtures or a more powerful shower.
    • Accumulator Tank (Optional but Recommended): A small pressure tank installed after the pump.
      • Why: It acts as a buffer, reducing pump cycling (the pump turning on and off rapidly) and providing a more consistent water flow. This extends the life of your pump and makes for a smoother user experience.

    3. Water Heater (The Luxury of Warmth)

    Having hot water significantly enhances comfort. There are several popular options for heating water in a camper van:

    • Gas Water Heaters (LPG):
      • How: These units use propane (LPG) to heat water on demand or store it in a small tank.
      • Pros: Excellent for off-grid camping as they don’t rely heavily on your electrical system (though some require 12V for ignition/fan). Can provide very hot water quickly.
      • Cons: Requires a supply of LPG, and proper ventilation is critical for safety. Installation often involves external vents.
      • Examples: Suburban, Truma.
    • 240V Electric Water Heaters:
      • How: These units heat water using standard shore power (240V AC). They typically have a small internal tank.
      • Pros: Simple to operate when connected to mains power (e.g., at a caravan park). No gas required.
      • Cons: High power draw, making them unsuitable for off-grid use unless you have a very large inverter and battery bank. Heating can be slow.
      • Examples: Duoetto (can be 12V/240V dual), small tankless electric heaters.7
    • Diesel Water Heaters:
      • How: These systems use diesel from your vehicle’s fuel tank to heat water and often provide cabin heating too.
      • Pros: Efficient, uses readily available fuel, and often integrated with a heater, saving space. Great for colder climates.
      • Cons: More complex and expensive to install.
      • Examples: Truma Combi, Webasto.
    • Heat Exchanger / Engine Heat:
      • How: Utilises the heat from your van’s engine coolant to heat a water tank while you drive.8
      • Pros: “Free” hot water while travelling, no additional fuel source needed.
      • Cons: Only provides hot water after driving, and water cools once the engine is off. Can be more complex to plumb into the engine’s cooling system.

    4. Fixtures and Appliances

    • Kitchen Plumbing (Sink & Tap):
      • Sink: Compact stainless steel sinks are popular for durability and easy cleaning.9 Consider a deeper sink for dishwashing.
      • Tap/Faucet: Choose a low-flow tap to conserve water. A pull-out sprayer can be very versatile. Many 12V taps are available, or you can use a standard household tap with a 12V pump.
      • Drain: Connects to your grey water tank. Use flexible plumbing hose and secure connections.
    • Showers (Indoor & Outdoor):
      • Indoor Shower: Requires a dedicated shower tray, waterproof walls, and proper ventilation to manage condensation. Can take up significant space. Look for low-flow showerheads.
      • Outdoor Shower: A simple and popular solution for saving interior space. Can be a hose that connects to a quick-release fitting on the outside of your van, or a dedicated shower box. Ideal for rinsing off after a beach trip or muddy hike.
    • External Wash Bay (Hose Connection):
      • What: A quick-connect fitting on the exterior of your van that allows you to attach a hose for general washing, bike cleaning, or a simple external shower.
      • Why: Offers convenience for various tasks without needing to run hoses through the interior.10 Connects directly to your fresh water supply via the pump.

    5. Plumbing Lines (The Veins of the System)

    • PEX Tubing: Cross-linked polyethylene (PEX) is highly recommended for camper van plumbing.11
      • Pros: Flexible, durable, resistant to freezing and bursting, and easy to work with using push-fit or crimp fittings. It’s also less prone to kinking than some other flexible hoses.
    • Flexible PVC Hoses: Suitable for grey water drains, but ensure they are food-grade if used for fresh water.
    • Fittings: Use high-quality push-fit or crimp fittings designed for PEX to create secure, leak-proof connections. Hose clamps are essential for securing flexible drain hoses.12
    • Drainage: Ensure all drain lines have a slight downward slope to allow water to flow freely into the grey water tank and prevent standing water.13

    Planning Your Plumbing System

    1. Map Your Layout: Before buying anything, sketch out your van’s interior and decide where your water tanks, sink, shower, and water heater will go. Consider accessibility for filling, draining, and maintenance.
    2. Estimate Water Usage: Be realistic about how much water you’ll need. Every litre counts in a van! Factor in drinking, cooking, washing dishes, and showers.
    3. Choose Your Hot Water Solution: This decision significantly impacts your power usage (electrical or gas) and overall system complexity.
    4. Consider Winterisation: If you plan to travel in cold climates, think about insulation for tanks and pipes, or how you’ll drain your system to prevent freezing and damage.
    5. Safety First: Always use potable (drinking water safe) components for your fresh water system. Ensure all gas connections are installed by a qualified professional if you opt for gas appliances. Proper venting for gas heaters is paramount.

    A well-planned and installed plumbing system is an investment in your camper van’s functionality and your overall comfort on the road. With the right components, you’ll have the luxury of running water wherever your adventures take you.

  • 12V & 24V Electric Systems in Camper Van Conversion

    12V & 24V Electric Systems in Camper Van Conversion

    Powering Your Adventure: A Comprehensive Guide to Camper Van Electrical Systems

    The freedom of the open road in a camper van is undeniably appealing, but behind every comfortable off-grid experience lies a well-designed electrical system. This crucial infrastructure powers everything from your fridge and lights to your laptop and phone, transforming a simple vehicle into a true home on wheels. Understanding the “what, why, when, where, and how” of camper van electrical systems, particularly 12V and 24V battery setups, is essential for a reliable and enjoyable journey.

    What is a Camper Van Electrical System?

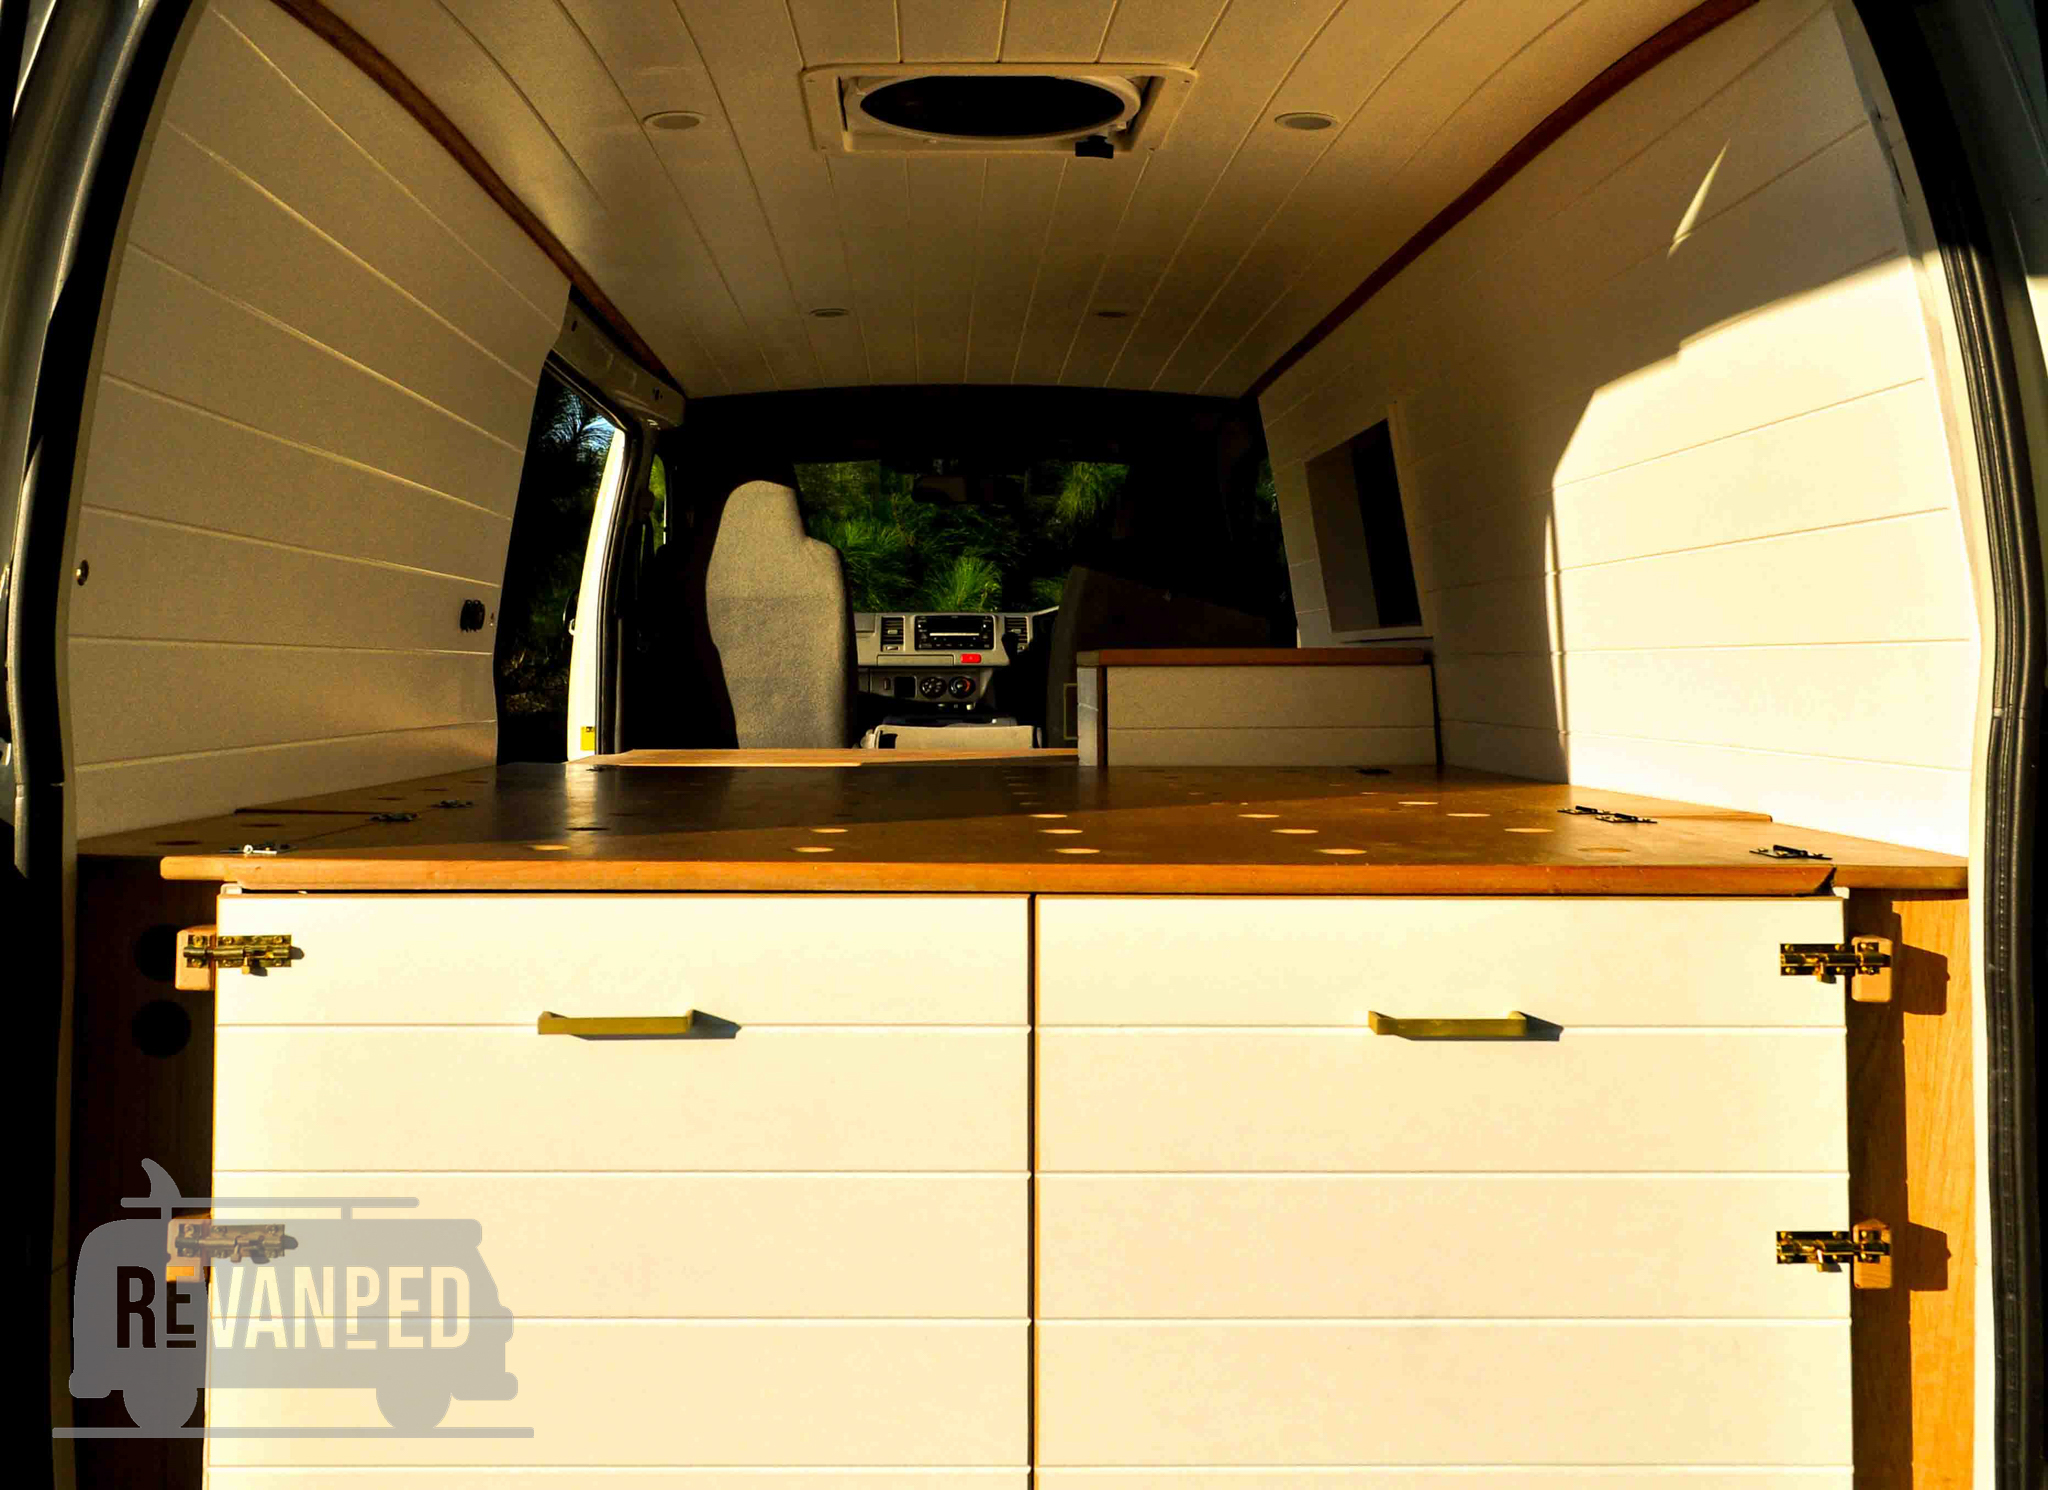
    At its core, a camper van electrical system is a self-contained power grid designed to operate independently from the vehicle’s engine (for house loads). It typically consists of a “house” battery bank, which stores energy, and various components that generate, manage, and convert that energy to power your appliances.1 Unlike your vehicle’s starter battery, which is solely for starting the engine, the house battery is a deep-cycle battery built to be discharged and recharged repeatedly.

    Why Do You Need a Dedicated Electrical System?

    Freedom and Independence: The primary reason is to achieve true off-grid capability. Without a dedicated system, you’re constantly reliant on shore power hookups (campground electricity) or running your engine to power your devices.

    Comfort and Convenience: Imagine fresh food from your fridge, a hot shower, charged devices, and good lighting – all made possible by a robust electrical setup.

    Cost Savings: While there’s an upfront investment, being able to boondock (camp without hookups) saves money on campground fees in the long run.

    Sustainability: Integrating solar panels allows you to harness renewable energy, reducing your carbon footprint.2

    When to Consider 12V vs. 24V Battery Systems?

    The choice between a 12V and 24V system largely depends on your power consumption needs and the size of your van. Both have their advantages and disadvantages:

    12V Systems:

    • What: The most common voltage for smaller to medium camper van setups. Most readily available RV appliances, lights, and USB chargers are designed for 12V.
    • Why (Pros):
      • Simplicity and Availability: Components are generally easier to find, more affordable, and simpler to wire for DIY enthusiasts.
      • Direct Compatibility: Many smaller appliances can plug directly into 12V outlets without conversion.
      • Beginner-Friendly: Less complex to design and troubleshoot.
    • Why (Cons):
      • Higher Current: For the same amount of power, 12V systems draw twice the current of a 24V system. This means thicker, more expensive wiring is needed for higher-power appliances or longer cable runs to minimise voltage drop and heat.
      • Less Efficient for High Loads: Inverters for large AC loads (like air conditioners or induction cooktops) can be less efficient at 12V due to the higher current draw.
    • When to Choose: Ideal for those with moderate power needs, running standard RV appliances, and who prefer a simpler, more common setup. Typically recommended for solar arrays under 1450W and inverters under 3000W (or 2000W with AC).

    24V Systems:

    • What: Gaining popularity for larger vans or those with significant power demands, especially for high-wattage appliances.
    • Why (Pros):
      • Lower Current, Smaller Wires: For the same power, current is halved, allowing for thinner, lighter, and potentially cheaper wiring, especially for long runs. This reduces resistive losses and voltage drop.
      • Greater Efficiency for High Loads: 24V systems are more efficient at transmitting power, making them better suited for appliances like air conditioners, large fridges, or induction cooktops.3 Inverters designed for 24V can be more efficient.
      • Scalability: Easier to expand for future power needs.
      • Smaller Solar Charge Controllers: For the same size solar array, a smaller (and often cheaper) MPPT solar charge controller can be used.
    • Why (Cons):
      • Component Availability: While improving, 24V specific appliances are less common than 12V, often requiring step-down converters to run 12V devices.4 This adds complexity and potential for efficiency loss during conversion.
      • Increased Complexity: Wiring a hybrid 12V/24V system can be more challenging for beginners.
      • Higher Upfront Cost: While wiring might be cheaper, some 24V components (like specific water pumps) can be more expensive.
      • Solar Panel Compatibility: Requires 24V solar panels or 12V panels wired in series to match the battery bank voltage.
    • When to Choose: Recommended for those with high power demands, planning extended off-grid travel, running large appliances (over 3000W inverter, or 3000W inverter with AC), or those with solar arrays exceeding 1450W.5

    Where Do These Systems Get Installed?

    • Battery Bank: Typically stored in a cool, dry, and well-ventilated area, often under a bed, seat, or in a dedicated battery box.6 Lithium batteries can be more flexible in placement due to their thermal stability.7
    • Solar Panels: Mounted on the van’s roof to maximize sun exposure.8 Flexible panels can be adhered directly, while rigid panels are usually mounted with Z-brackets or corner mounts.
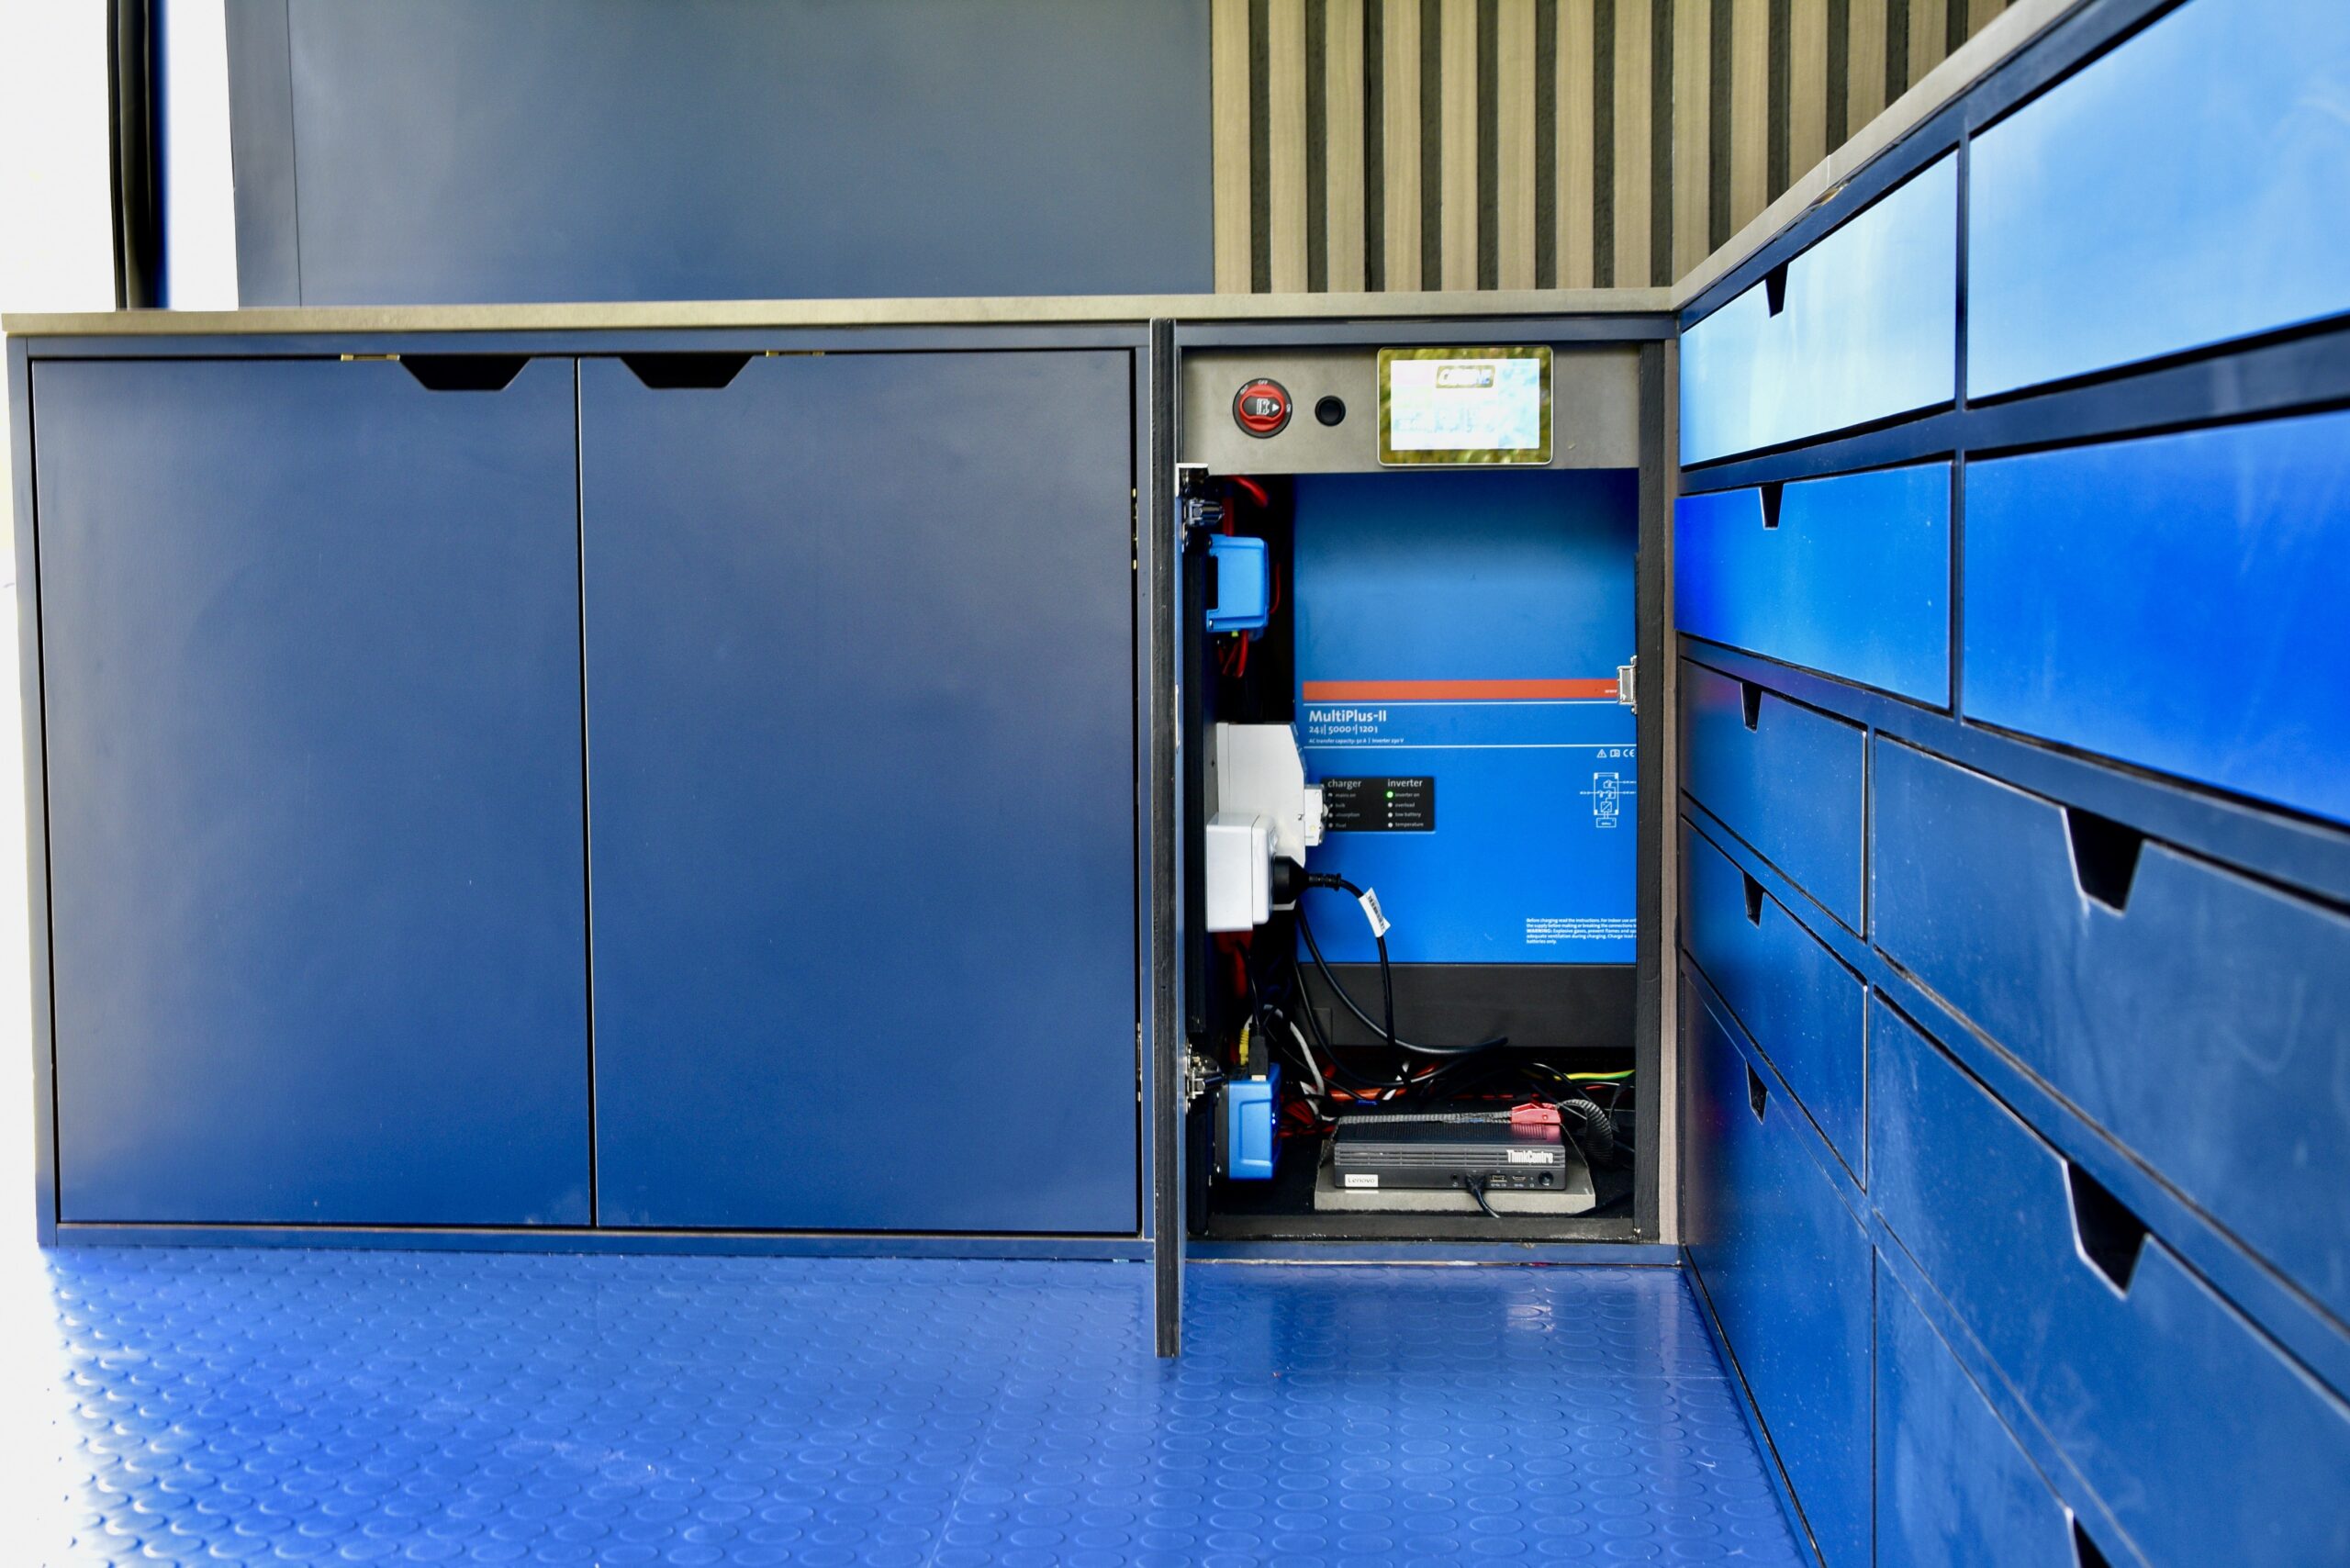
    • Charge Controllers & Other Electronics: Usually located near the battery bank in an accessible but protected area, often within a cabinet or electrical enclosure. Good ventilation is crucial to prevent overheating.
    • Wiring: Runs throughout the van, carefully routed and secured to avoid chafing, kinks, and potential hazards.9 Proper wire sizing and protection (conduit, loom) are essential.
    • Outlets & Switches: Strategically placed throughout the living space for convenience.

    How Do the Components Work Together?

    A typical camper van electrical system involves several key components working in harmony:

    1. Batteries (The Power Reservoir)

    • What: Deep cycle batteries are designed for sustained discharge and recharge cycles, unlike starter batteries.10
    • Why: They store the electrical energy that powers your van’s appliances.
    • Types:
      • Lead-Acid (AGM, Gel, Flooded): More affordable upfront. AGM (Absorbed Glass Mat) are popular for their sealed, maintenance-free nature and good performance in various temperatures.11 Gel batteries are similar but offer even better deep-cycle performance and temperature tolerance. Flooded lead-acid require regular maintenance (checking water levels) and ventilation.12
        • Pros (AGM/Gel): Lower initial cost, relatively robust.
        • Cons (AGM/Gel): Heavier, lower usable capacity (typically only 50-60% of rated capacity should be used to prolong lifespan), slower charging, shorter lifespan compared to lithium.
      • Lithium Iron Phosphate (LiFePO4): Increasingly popular for their superior performance.13
        • Pros:
          • Lightweight: Significantly lighter than lead-acid batteries for the same usable capacity.14
          • High Usable Capacity: Can be discharged almost completely (80-100%) without damage, meaning a smaller Ah rating provides more usable energy.
          • Long Lifespan: Thousands of charge cycles, potentially lasting 5-10 times longer than lead-acid.15
          • Faster Charging: Can accept a higher charge current, meaning quicker replenishment.
          • Consistent Voltage Output: Maintain a more stable voltage throughout their discharge cycle.
          • Maintenance-Free: No need for watering or special ventilation.
          • Built-in BMS: Most LiFePO4 batteries come with a Battery Management System (BMS) that protects against overcharging, over-discharging, over-current, and temperature extremes.
        • Cons: Higher initial cost.

    2. Solar Panels (Renewable Energy Source)

    • What: Convert sunlight into DC (Direct Current) electricity.
    • Why: Provide a sustainable way to recharge your house batteries, especially when off-grid.
    • Types:
      • Monocrystalline: Most efficient, best for limited roof space.
      • Polycrystalline: Less efficient, but more affordable.
      • Flexible: Lightweight and can conform to curved surfaces, but often less efficient and durable than rigid panels.16
      • Rigid: More durable and generally more efficient, but require more robust mounting.
    • Sizing: Depends on your daily energy consumption (calculated in Watt-hours or Amp-hours) and the amount of sun exposure you expect. A general rule of thumb is to aim for enough solar to cover your average daily usage, with a buffer. For example, if you use 100Ah per day, and you get 5 effective sun hours, you’d need roughly a 240W solar panel (100Ah * 12V = 1200Wh / 5 hours = 240W).

    3. Solar Charge Controller (The Manager)

    • What: Regulates the voltage and current from the solar panels to prevent overcharging and damage to your batteries.
    • Why: Essential for battery health and system longevity.
    • Types:
      • PWM (Pulse Width Modulation): A simpler, more affordable option. It essentially acts as a switch, connecting the solar panel directly to the battery, allowing the battery voltage to “pull down” the panel’s voltage. This means it’s less efficient at harvesting power, especially when the panel voltage is significantly higher than the battery voltage. Good for smaller, simpler setups where cost is a major factor.
      • MPPT (Maximum Power Point Tracking): More advanced and efficient.17 An MPPT controller intelligently tracks the “maximum power point” of the solar panel, converting the panel’s higher voltage/lower current output into the optimal voltage/higher current required for efficient battery charging.18 This can result in 15-30% more power harvest, especially in colder conditions or when the panel’s voltage is much higher than the battery. Highly recommended for larger systems and LiFePO4 batteries.

    4. DCDC Charger (Charging on the Go)

    • What: A DC-to-DC charger charges your house battery from your vehicle’s alternator while you drive.19
    • Why: Allows you to top up your house batteries without relying solely on solar, especially useful on cloudy days or when driving long distances.
    • How: It takes the variable voltage from your alternator (which can fluctuate, especially with “smart” alternators in newer vehicles) and converts it into a stable, multi-stage charging profile specifically designed for your house battery chemistry (e.g., LiFePO4 or AGM).20 Many DCDC chargers also include a built-in battery isolator function, ensuring your starter battery isn’t drained by your house loads when the engine is off.21 Some advanced DCDC chargers also have a solar input, acting as both a DCDC charger and an MPPT solar charge controller in one unit.22
    • DCDC Charger vs. Battery Isolator:
      • Battery Isolator (Voltage Sensitive Relay/VSR): A simpler, cheaper device that simply connects the starter battery to the house battery when the engine is running and disconnects them when the engine is off. It doesn’t regulate voltage or provide multi-stage charging, which can lead to undercharging of house batteries (especially lithium) and isn’t ideal for modern smart alternators.
      • DCDC Charger: The superior choice, especially for lithium batteries and newer vehicles. It provides optimized charging, protects the starter battery, and handles smart alternators effectively.

    5. Shore Power Charger (When You’re Plugged In)

    • What: An AC-to-DC charger that allows you to charge your house batteries when plugged into external AC power (like at a campground or home outlet).23
    • Why: Provides a reliable way to fully charge your batteries and run high-power appliances without draining your battery bank, especially useful in winter or when parked for extended periods.
    • How: It converts the 240V AC power from the grid into the appropriate DC voltage for your battery bank, often providing multi-stage charging.

    6. Inverter (AC Power for Home Appliances)

    • What: Converts the DC power from your battery bank into AC (Alternating Current) power, which is what most household appliances use (e.g., laptops, blenders, coffee makers).24
    • Why: To run standard 240V appliances in your van.
    • Types:
      • Modified Sine Wave: Cheaper, but produces a “choppier” waveform. Suitable for simple resistive loads (lights, heaters) but can damage sensitive electronics (laptops, some fridges) or make them run inefficiently. Not recommended for most modern appliances.
      • Pure Sine Wave: More expensive, but produces a clean, smooth waveform identical to household electricity. Essential for sensitive electronics, appliances with motors (fridges, blenders), and induction cooktops. Always choose pure sine wave if your budget allows.
    • Sizing: Determine the maximum continuous wattage you’ll need to draw (sum of all AC appliances running simultaneously), and add a buffer (15-20%).25 Also consider the “surge” or “peak” wattage, which is the brief higher power draw some appliances have when starting up (e.g., fridges, microwaves). Your inverter must be able to handle this peak.

    7. Battery Monitor System (The Dashboard)

    • What: Provides real-time information about your battery’s state of charge, voltage, current draw, and power input/output.26
    • Why: Crucial for understanding your power consumption, preventing over-discharge, and maximizing battery lifespan.
    • How: Typically uses a “shunt” (a low-resistance resistor) installed on the negative side of your battery bank. The shunt measures the flow of current in and out of the battery, and the monitor unit then calculates and displays the relevant data.27 Look for smart monitors with Bluetooth connectivity for easy monitoring via your phone.

    8. Fuses and Circuit Breakers (Safety First!)

    • What: Essential safety devices that protect your wiring and components from overcurrents and short circuits.
    • Why: Prevent damage to equipment and, more importantly, mitigate the risk of electrical fires.
    • How: Fuses are one-time use devices that melt and break the circuit when current exceeds their rating.28 Circuit breakers are resettable switches that trip when an overcurrent occurs.29 Both are strategically placed throughout the system at critical points (e.g., near the battery, before high-current devices).

    9. Wiring and Cables (The Lifelines)

    • What: The conductors that carry electricity between all your components.
    • Why: To transmit power safely and efficiently.
    • How: Proper wire gauge (thickness) is critical. Undersized wires can overheat, cause voltage drop, and lead to poor performance or fire hazards.30 The required gauge depends on the current (amps) and the length of the cable run. Always consult wiring charts and err on the side of using thicker wire. All connections should be secure, properly crimped, and insulated.

    Conclusion

    Building an electrical system for your camper van can seem daunting, but by understanding the purpose and function of each component, you can design a reliable and safe setup that perfectly matches your adventuring style. Whether you opt for the simplicity of a 12V system or the efficiency of a 24V setup, investing in quality components and carefully planning your layout will ensure you have the power you need to truly live off the grid and enjoy the freedom of van life to its fullest. Always consult relevant electrical safety standards and consider professional assistance if you’re unsure about any aspect of your installation.